Monday, December 11, 2006

Nortel VPN on Ubuntu edgy

download evaluation version of apani vpn client for nortel.
(limitation of evaluation version : connection time is limited)

http://www.apani.com/vpn-clients/nortel-overview

unzip and untar.
or install src.rpm

make sure that linux kernel source in /usr/src/linux and gcc above 3.3.

change path to /temp/apani/src

make

compile was failed with numerous error messages.

so refer
http://ubuntuforums.org/showthread.php?t=110843

change the ./src/linux_wrapper.c

Compile was OK.

check the netlock script available.

all installation process was good.

but for the login, all failed with errors.


ck$ cat /etc/netlock/agentlog.txt | more
2006-12-10 22:36:29 (16,11ba0005):**********************************
2006-12-10 22:36:30 (16,11ba0005):Starting Netlock Contivity Client V3.3 018D.20
050713.1000
2006-12-10 22:36:30 (16,11ba0005):OS: Linux Version: 2.6.17-10-generic (i686)

2006-12-10 22:36:30 (16,11ba0005):**********************************
2006-12-10 22:36:30 (16,124b0001):Console auditing changes: *TRACE Messages Enab
led*
2006-12-10 22:36:30 (16,124b0003):File auditing changes: *SECURITY Messages Enab
led* *PROTOCOL Messages Enabled* *SYSTEM Messages Enabled*
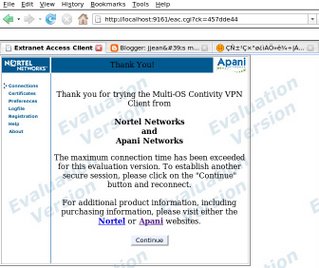
2006-12-10 22:41:32 (16,12e80008):<<<<<<<<<<<<<<<<<<<<<<<<<<<<<<<<<< onblur="try {parent.deselectBloggerImageGracefully();} catch(e) {}" href="http://photos1.blogger.com/x/blogger/1303/1418/1600/448312/login.jpg">This is login screen.


This is successful login.


and time linitation for evaluation version.


Due to its 5 miniutes time limit, run the script at start of system.

in script, just add one command.

watch -n 300 cvc -c vpn:user:password &


But, My companys groupware was not ran on linux-firefox. It's script was based on IE.

Tuesday, December 05, 2006

nvidia driver 1.0.9631 released !

My toshiba 5100 notebook has EDID problem when it was used with nvidia driver.
certain dirty workaround tip must be applied.

Even though it goes, it runs fine for 8776 driver with its twinview and GLX support features.

But the most fascinating feature among linuxer is eye-candy desktop - compiz or beryl. due to lack of GL command set in nvidia driver, using XGL is the only way to use those for nvidia users but it's too buggy and slow.

from the release of nvidia beta driver 9625, GLX_EXT_texture_from_pixmap can be support in native nvidia driver level.

But in my toshiba 5100 laptop, all affort for using this turns to be failed.

from 9625 to 9629 (finally released as official version!), using those driver always cause the system hang while X was loading.

At last, 9631 version driver was released in 1 december 2006.

all nauty issues within nvidiia driver and toshiba laptop was resolved.

Tuesday, November 14, 2006

vi quick reference

ESC , then ":": command mode
Move :
h left one character
l right one character
k up one line
j down one line

b back one word
f forward one word
{ up one paragraph
} down one paragraph
$ to end of the line

^B back one page
^F forward one page
17G to line #17
G to the last line

Insert :
i just before the current cursor position
a just after the current cursor position
o into a new line below current cursor
I
at the beginning of the current line
A at the end of the current line
O into a new line above current cursor
search : /
replace : r, R
replace (global) : %s/old/new/g
change : c, C
>> Copy current line     yy  or Y
>> Copy a word yw
>> Copy 4 words y4w or 4yw
>> Paste after cursor p
>> Paste before cursor P
>> Move current line after line 5 :m 5
>> Move line x after line 5 :xt 5
>> Move line 9 after line 5 :9t 5
>> Undo last modification u
>> Undo all changes on a given line U
>> Global search and replace --> :1,$ s/old/new/g
>> Insert file at cursor position --> :r filename


Capitalize the first letter of each word from line #26 through the end of the file --> :26,$s/\<[a-z]/\U&/g Multi file editing

vi can manipulate more than one file at the same time, therefore to edit three files in sequence, type:
vi one two three
To detect which file is currently edited use the ex ar (args) command:
:ar
that types file list and flags current file at screen bottom as follows:
one [two] three

:w write file with the following message at screen bottom:

"vi_ex.doc" 670 lines, 27747 chars
ZZ terminate current editing with the following message at screen bottom:

2 more files to edit

To move along files in the list:


vi Multifile Moving Commands
:n edit next file in the list
: Nn advance n files in the list
~ toggle between the two last files
:e# reopen previous file, same as above
e file re-edit from disk
:rew rewind file pointer to first file
:rew! force rewind and immediatly reopen first file
:ar list file names


compiz beryl

compiz beryl
1. AIGLX with nvidia driver native support, compiz-free-desktop

2. GLX with nvidia driver , beryl-manager

nvidia glx driver

Toshiba 5100 has a Nvidia 440 go GPU(NV17).
nvidia glx driver
87.76
71.84
96.29

vmplayer for VPN

widnows 2000 in VMPlayer.
Nortel

Upgrade to Ubuntu edgy eft

From dapper, moved to Edgy.

Update is very simple and easy.

1. Change the /etc/apt/sources.list
in the repository list, change all "dapper" to "edgy"

If you use vi, type following in command mode.

:%s/dapper/edgy/g

It's done!!

2. update the repository list with
$ sudo apt-get update

3. just type upgrade and give a long time to system.
$ sudo apt-get dist-upgrade


At my case, It takes about 5 hours.
here's my new upgrade 2.6.17 kernel.

jn@satellite:~$ uname -a
Linux satellite 2.6.17-10-386 #2 Fri Oct 13 18:41:40 UTC 2006 i686 GNU/Linux

Monday, August 07, 2006

Nortel VPN in linux

for using nortel VPN in linux laptop, tried hundred of sites but failed.

So I have decided that installing VMware is best solution.

Becuase disk space is not enough in my toshiba 5100, windows 98 SE was chosen for guest OS.
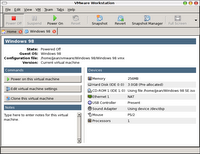
And installed a nortel extranet 2.56, installing looks fine but failed with error.

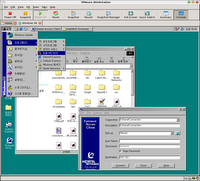
Error message saying " Your IPsec tunneling have some problem."

to enable IPsec on Vmware NAT another hundreds of searching was done.
Of cource it was ended with fail.

So I decide to find a VPN client for linux.
Because I don't have Nortel's VPN Client - provided with VPN switch-, have to find a freeware.

First I found "pptp"
apt-get install pptp

to configure this, also installed "pptpconfig"
add following on /etc/apt/sources.list

# James Cameron's PPTP GUI packaging deb http://quozl.netrek.org/pptp/pptpconfig ./
apt-get install pptpconfig

and, start the 'pptpconfig' and add the host.
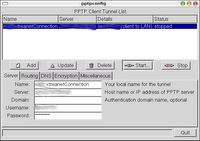
failed again.


And Found anotheroption, OpenSwan(www.openswan.org) will make a ipsec tunneling in linux.

apt-get install openswan.

it's installed greatly and ipsec command runs fine.
but I didn't find a way to connect VPN.

So have decided to install a cisco vpn client which use a same ipsec protocol.

followings are from http://www.mcmaster.ca/uts/network/vpn/vpnclient_linux.htm

Below is a quick installation and configuration guide for the Linux Cisco VPN client. For more in depth instructions, please refer to the Cisco documentation linked below.

Before you Begin...
  • This software and guide is unsupported by University Technology Services. This means that the installation and software has been tested by UTS, but no telephone support is available.
  • The VPN client consists of a kernel module and a few command-line executables.
    • The kernel module is not pre-compiled, so you may need to make sure that kernel sources for each kernel version that you are intending to use with this client are properly installed.
    • To do this, find either the kernel source or header RPM from your installation cdroms. The most likely location is one of the RPMxx directories on one of the installation CD's. On Mandrake 9.2, it's called kernel-source-2.4.22-10mdk.i586.rpm, on Redhat 9.0 it's called kernel-source-2.4.20-8.i386.rpm. The kernel revision numbers change but you get the idea. Older versions of Linux may have just the kernel-header RPM.
    • Install the RPM (rpm -i kernel-source-xxxxxx.rpm)
    • The module is not Open Source Software, so after it's loaded into your Linux kernel, the kernel will become tainted, and will issue a warning.
  • After successfully establishing a secure connection to the server, the client will listen for packets from the VPN server on 2 ports,UDP 500 and UDP 4500, by default. This means you have to punch a hole in your ipchains/iptables firewall for it. The module will also use IP protocol 50 (ESP) to communicate with the VPN server. That protocol is not filtered by most Linux firewall configurations, however.
  • The CISCO documentation mentions several other ports, quoting:
    • UDP port 500
    • UDP port 10000 and 500 (or any other port number being used for IPSec/UDP)
    • IP protocol 50 (ESP)
    • NAT-T port 4500 UDP
    Allow these ports through your firewall if you don't want any surprises.
  • On our test systems, it appears that the VPN client will not work, when the operating system is running in "Security Enhanced" mode (SELinux). We suggest that you not run the system in this mode, if you plan on using the vpn client. To do this, cd to the /etc/selinux folder ... then edit the config file as follows (change "enforcing" to "disabled"). In this example, it's simply been commented out:
    [root@linuxbox selinux]# more config
    # This file controls the state of SELinux on the system.
    # SELINUX= can take one of these three values:
    # enforcing - SELinux security policy is enforced.
    # permissive - SELinux prints warnings instead of enforcing.
    # disabled - SELinux is fully disabled.
    #SELINUX=enforcing
    SELINUX=disabled
    # SELINUXTYPE= type of policy in use. Possible values are:
    # targeted - Only targeted network daemons are protected.
    # strict - Full SELinux protection.
    SELINUXTYPE=targeted
    [root@linuxbox selinux]#
  • Installation and Configuration Commands, Step by Step

    Below are step by step quick-start instructions. Be sure to connect to your ISP before starting.
    This client has been tested on systems running Fedora Core 4.
    [root@linuxbox ~]# uname -a Linux linuxbox.whatever.mcmaster.ca 2.6.11-1.1369_FC4 #1 Thu Jun 2 22:55:56 EDT 2005 i686 i686 i386 GNU/Linux

    • Become super user (root):
    • [user@vpnclient]$ su -
      Password: {root's password}

      [root@vpnclient root]#
    • Change directory to /usr/src:
    • [root@vpnclient root]# cd /usr/src
    • Download the tar ball from the University web site:
    • [root@localhost root]# wget http://www.mcmaster.ca//uts/network/software/vpnclient4.8.tar.gz
      --09:59:22-- http://www.mcmaster.ca//uts/network/software/vpnclient4.8.tar.gz => `vpnclient4.8.tar.gz'
      Resolving www.mcmaster.ca... 130.113.64.65
      Connecting to www.mcmaster.ca[130.113.64.65]:80... connected.
      HTTP request sent, awaiting response... 200 OK
      Length: 2,050,187 (2.0M) [application/x-tar]

      100%[===============================================>] 2,050,187 10.02M/s 09:59:22 (10.02 MB/s) - `vpnclient4.8.tar.gz' saved [2050187/2050187]

      Length: 2,811,577 [application/x-tar]

      100%[====================================>] 2,811,577 9.31M/s 10:55:29 (9.31 MB/s) - `vpnclient-linux4.7.tar.gz' saved [2,811,577/2,811,577]
    • Decompress and extract it:
    • [root@vpnclient src]# tar xzvf vpnclient4.8.tar.gz

      vpnclient/
      vpnclient/linux_os.h
      vpnclient/IPSecDrvOS_linux.c
      vpnclient/mtu.h
      vpnclient/linuxkernelapi.c
      vpnclient/vpnapi.h
      vpnclient/libdriver64.so
      vpnclient/license.txt
      vpnclient/sample.pcf
      vpnclient/cvpnd
      vpnclient/interceptor.c
      vpnclient/unixcniapi.h
      vpnclient/MacConnect.pcf
      vpnclient/Makefile
      vpnclient/GenDefs.h
      vpnclient/libdriver.so
      vpnclient/config.h
      vpnclient/vpn_uninstall
      vpnclient/McMasterVPN.pcf
      vpnclient/vpnclient_init
      vpnclient/IPSecDrvOS_linux.h
      vpnclient/cisco_cert_mgr
      vpnclient/Cniapi.h
      vpnclient/vpnclient
      vpnclient/libvpnapi.so
      vpnclient/unixkernelapi.h
      vpnclient/ipseclog
      vpnclient/IPSecDrvOSFunctions.h
      vpnclient/linuxcniapi.c
      vpnclient/license.rtf
      vpnclient/vpn_install
      vpnclient/driver_build.sh
      vpnclient/vpnclient.ini
      vpnclient/frag.c
      vpnclient/linuxcniapi.h
      vpnclient/frag.h
      vpnclient/vpn_ioctl_linux.h
    • Change directory to /usr/src/vpnclient:
    • [root@vpnclient src]# cd vpnclient
    • Execute the installer script and answer the prompts:
    • [root@localhost vpnclient]# ./vpn_install
      Cisco Systems VPN Client Version 4.8.00 (0490) Linux Installer
      Copyright (C) 1998-2005 Cisco Systems, Inc. All Rights Reserved.
      By installing this product you agree that you have read the
      license.txt file (The VPN Client license) and will comply with
      its terms.

      Directory where binaries will be installed [/usr/local/bin]

      Automatically start the VPN service at boot time [yes]


      In order to build the VPN kernel module, you must have the
      kernel headers for the version of the kernel you are running.
      Directory containing linux kernel source code [/lib/modules/2.6.16-1.2111_FC4/build]
      * Binaries will be installed in "/usr/local/bin".
      * Modules will be installed in "/lib/modules/2.6.16-1.2111_FC4/CiscoVPN".
      * The VPN service will be started AUTOMATICALLY at boot time.
      * Kernel source from "/lib/modules/2.6.16-1.2111_FC4/build" will be used to build the module.

      Is the above correct [y] y

      Making module
      make -C /lib/modules/2.6.16-1.2111_FC4/build SUBDIRS=/usr/src/vpnclient modules
      make[1]: Entering directory `/usr/src/kernels/2.6.16-1.2111_FC4-i686'
      CC [M] /usr/src/vpnclient/linuxcniapi.o
      CC [M] /usr/src/vpnclient/frag.o
      CC [M] /usr/src/vpnclient/IPSecDrvOS_linux.o
      CC [M] /usr/src/vpnclient/interceptor.o
      /usr/src/vpnclient/interceptor.c: In function ‘handle_vpnup’:
      /usr/src/vpnclient/interceptor.c:310: warning: assignment from incompatible pointer type
      /usr/src/vpnclient/interceptor.c:334: warning: assignment from incompatible pointer type
      /usr/src/vpnclient/interceptor.c:335: warning: assignment from incompatible pointer type
      /usr/src/vpnclient/interceptor.c: In function ‘do_cleanup’:
      /usr/src/vpnclient/interceptor.c:378: warning: assignment from incompatible pointer type
      CC [M] /usr/src/vpnclient/linuxkernelapi.o
      LD [M] /usr/src/vpnclient/cisco_ipsec.o
      Building modules, stage 2.
      MODPOST
      Warning: could not find /usr/src/vpnclient/.libdriver.so.cmd for /usr/src/vpnclient/libdriver.so
      CC /usr/src/vpnclient/cisco_ipsec.mod.o
      LD [M] /usr/src/vpnclient/cisco_ipsec.ko
      make[1]: Leaving directory `/usr/src/kernels/2.6.16-1.2111_FC4-i686'
      Create module directory "/lib/modules/2.6.16-1.2111_FC4/CiscoVPN".
      Copying module to directory "/lib/modules/2.6.16-1.2111_FC4/CiscoVPN".
      Already have group 'bin'

      Creating start/stop script "/etc/init.d/vpnclient_init".
      /etc/init.d/vpnclient_init
      Enabling start/stop script for run level 3,4 and 5.
      Creating global config /etc/opt/cisco-vpnclient

      Installing license.txt (VPN Client license) in "/opt/cisco-vpnclient/":

      Installing bundled user profiles in "/etc/opt/cisco-vpnclient/Profiles/":
      * New Profiles : MacConnect McMasterVPN sample

      Copying binaries to directory "/opt/cisco-vpnclient/bin".
      Adding symlinks to "/usr/local/bin".
      /opt/cisco-vpnclient/bin/vpnclient
      /opt/cisco-vpnclient/bin/cisco_cert_mgr
      /opt/cisco-vpnclient/bin/ipseclog
      Copying setuid binaries to directory "/opt/cisco-vpnclient/bin".
      /opt/cisco-vpnclient/bin/cvpnd
      Copying libraries to directory "/opt/cisco-vpnclient/lib".
      /opt/cisco-vpnclient/lib/libvpnapi.so
      Copying header files to directory "/opt/cisco-vpnclient/include".
      /opt/cisco-vpnclient/include/vpnapi.h

      Setting permissions.
      /opt/cisco-vpnclient/bin/cvpnd (setuid root)
      /opt/cisco-vpnclient (group bin readable)
      /etc/opt/cisco-vpnclient (group bin readable)
      /etc/opt/cisco-vpnclient/Profiles (group bin readable)
      /etc/opt/cisco-vpnclient/Certificates (group bin readable)
      * You may wish to change these permissions to restrict access to root.
      * You must run "/etc/init.d/vpnclient_init start" before using the client.
      * This script will be run AUTOMATICALLY every time you reboot your computer.

    • Load the VPN client's module into the running kernel:

    • [root@localhost vpnclient]# /etc/init.d/vpnclient_init start
      Starting /opt/cisco-vpnclient/bin/vpnclient: Done


    • At this point, we recommend that you restart the operating system ... otherwise, you may get the following message, when invoking the vpnclient: vpnclient: error while loading shared libraries: /opt/cisco-vpnclient/lib/libvpnapi.so: cannot restore segment prot after reloc: Permission denied

    • McMaster VPN requires a profile to connect. Two are provided, one for off campus users (McMasterVPN) and one for on campus MacConnect users (MacConnect).
    • The profiles are already installed in /etc/CiscoSystemsVPNClient/Profiles/:
    • To connect, enter your user name and password when prompted:

    • [root@localhost Profiles]# vpnclient connect MacConnect {or McMasterVPN for off Campus (Access from home)}
      Cisco Systems VPN Client Version 4.8.00 (0490)
      Copyright (C) 1998-2005 Cisco Systems, Inc. All Rights Reserved.
      Client Type(s): Linux
      Running on: Linux 2.6.16-1.2111_FC4 #1 Sat May 20 19:59:40 EDT 2006 i686
      Config file directory:

      Initializing the VPN connection.
      Contacting the gateway at 130.113.69.8
      User Authentication for MacConnect...

      Enter Username and Password.

      Username []: (your username)
      Password []: ***************
      Authenticating user.
      Negotiating security policies.
      Securing communication channel.

      For McMaster Authorized Use Only!

      Please ensure you have the latest security patches and anti-virus software applied. Virus-infected
      computers will be disconnected without notice.

      Idle sessions are disconnected after 30 minutes of inactivity.

      All sessions are disconnected after 3 hours of continuous use.

      For assistance, please contact the Technology Service Desk at (905)-525-9140 Ext. 24357.
      Do you wish to continue? (y/n): y

      Your VPN connection is secure.

      VPN tunnel information.
      Client address: 130.113.94.113
      Server address: 130.113.69.8
      Encryption: 168-bit 3-DES
      Authentication: HMAC-MD5
      IP Compression: None
      NAT passthrough is inactive
      Local LAN Access is disabled

    • Note: If you open up another terminal window, and type "ifconfig" you should see - as well as the settings for your network interface, eth0 - another interface listed: "cipsec0" - this is the vpnclient interface. Its IP Address will be listed as well.
    • You should now be connected to the McMaster network. If the connection fails, suspect your firewall first. Try disabling it completely then try the connection again! If the firewall interferes with the VPN, you will need to adjust its configuration.

    Un-installing the Client

    • Use the vpn_uninstall script that comes with the client (/usr/src/vpnclient/vpn_uninstall in our example) to remove the client.

I changed /etc/opt/cisco-vpnclient/Profiles/sample.cnf to kai.pcf :

[main]
Description=KAIExtranetClient
Host=210.118.#.#
AuthType=3 <=== change for non-group authentification


and

root@satellite:~ # vpnclient connect kai
Cisco Systems VPN Client Version 4.8.00 (0490)
Copyright (C) 1998-2005 Cisco Systems, Inc. All Rights Reserved.
Client Type(s): Linux
Running on: Linux 2.6.15-26-686 #1 SMP PREEMPT Thu Aug 3 03:13:28 UTC 2006 i686
Config file directory: /etc/opt/cisco-vpnclient

Enter Certificate password: *****
Initializing the VPN connection.
Secure VPN Connection terminated locally by the Client
Reason: Failed to establish a VPN connection.
There are no new notification messages at this time.

Failed again.

so, Tried again on Openswan (IPsec)

root@satellite:~ # cat /etc/ipsec.conf
config setup
interfaces="ipsec0=eth0"
forwardcontrol=no
klipsdebug=none
plutodebug=none
manualstart=
# plutoload=%search
# plutostart=%search
# plutowait=no
conn kai
type=tunnel
auto=start
auth=esp
authby=secret
keyexchange=ike
keylife=1h
keyingtries=1
pfs=yes
left=192.168.209.130
leftnexthop=192.168.209.1
leftsubnet=192.168.209.0/24
right=210.118.#.#
rightsubnet=210.118.#.0/24


root@satellite:~ # cat /etc/ipsec.secrets
# RCSID $Id: ipsec.secrets.proto,v 1.3.6.1 2005/09/28 13:59:14 paul Exp $
# This file holds shared secrets or RSA private keys for inter-Pluto
# authentication. See ipsec_pluto(8) manpage, and HTML documentation.

# RSA private key for this host, authenticating it to any other host
# which knows the public part. Suitable public keys, for ipsec.conf, DNS,
# or configuration of other implementations, can be extracted conveniently
# with "ipsec showhostkey".
: RSA /etc/ipsec.d/private/satelliteKey.pem
192.168.209.130 210.118.126.201 ""


root@satellite:~ # ipsec setup start
ipsec_setup: Starting Openswan IPsec 2.4.4...
ipsec_setup: insmod /lib/modules/2.6.15-26-686/kernel/net/key/af_key.ko
ipsec_setup: insmod /lib/modules/2.6.15-26-686/kernel/net/ipv4/xfrm4_tunnel.ko
ipsec_setup: insmod /lib/modules/2.6.15-26-686/kernel/net/xfrm/xfrm_user.ko


root@satellite:~ # ipsec look
satellite Tue Aug 8 15:45:43 CDT 2006
Destination Gateway Genmask Flags MSS Window irtt Iface
0.0.0.0 192.168.209.1 0.0.0.0 UG 0 0 0 eth0
192.168.209.0 0.0.0.0 255.255.255.0 U 0 0 0 eth0
210.118.126.0 192.168.209.1 255.255.255.0 UG 0 0 0 eth0


Failed again !!!!


** note that ipsec port 500 is used by another program.

root@satellite:~ # lsof -i:500
COMMAND PID USER FD TYPE DEVICE SIZE NODE NAME
vmnet-nat 4548 root 6u IPv4 11693 TCP *:isakmp (LISTEN)
vmnet-nat 4548 root 7u IPv4 11694 UDP *:isakmp

in this case, you should close the vmware nat.


root@satellite:/etc/vmware/vmnet8/nat # /etc/init.d/vmware stop
Stopping VMware services:
Virtual machine monitor done
Bridged networking on /dev/vmnet0 done
DHCP server on /dev/vmnet1 done
Host-only networking on /dev/vmnet1 done
DHCP server on /dev/vmnet8 done
NAT service on /dev/vmnet8 done
Host-only networking on /dev/vmnet8 done
Virtual ethernet done

Linux Twinview in toshiba 5100

Right after success of enabling Nvidia X in my laptop, I start to modify it for twinview or TV-out.

Over two days of weekend passed, Some achievement was won.
Twinview(dual head) option runs great in my linux, but TV-out is still not..
Xorg does not set proper clock for TV encoder in toshiba 5100.


jjean@satellite:~$ cat /var/log/Xorg.0.log | less

....
(**) NVIDIA(0): TwinView enabled

(**) NVIDIA(0): ConnectedMonitor string: "DFP-0, CRT-0, TV-0"
(WW) NVIDIA(0): Unable to read EDID for display device CRT-0
(EE) NVIDIA(0): Failure reading maximum pixel clock value for display device
(EE) NVIDIA(0): TV-0.
(II) NVIDIA(0): NVIDIA GPU GeForce4 440 Go at PCI:1:0:0
(--) NVIDIA(0): VideoRAM: 32768 kBytes
(--) NVIDIA(0): VideoBIOS: 04.17.00.26.a4
(II) NVIDIA(0): Detected AGP rate: 4X
(--) NVIDIA(0): Interlaced video modes are supported on this GPU
(--) NVIDIA(0): Connected display device(s) on GeForce4 440 Go at PCI:1:0:0:
(--) NVIDIA(0): CRT-0
(--) NVIDIA(0): NVIDIA TV Encoder (TV-0)
(--) NVIDIA(0): NVIDIA Default Flat Panel (DFP-0)
(--) NVIDIA(0): CRT-0: 350.0 MHz maximum pixel clock
(--) NVIDIA(0): NVIDIA TV Encoder (TV-0): 100.0 MHz maximum pixel clock
(--) NVIDIA(0): TV encoder: NVIDIA
(II) NVIDIA(0): Mode Validation Overrides for CRT-0:
(II) NVIDIA(0): NoMaxPClkCheck
(II) NVIDIA(0): NoEdidMaxPClkCheck
(II) NVIDIA(0): Mode Validation Overrides for NVIDIA Default Flat Panel
(II) NVIDIA(0): (DFP-0):
(II) NVIDIA(0): NoMaxPClkCheck
(II) NVIDIA(0): NoEdidMaxPClkCheck
(II) NVIDIA(0): Assigned Display Devices: CRT-0, DFP-0
...

For acheiving, so many trial and error was dedicated.

here's key to the success.

jjean@satellite:~$ cat /etc/modprobe.d/options
# Enable double-buffering so gstreamer et. al. work
options quickcam compatible=2

# Default hostap to managed mode
options hostap_pci iw_mode=2
options hostap_cs iw_mode=2
options nvidia NVreg_SoftEDIDs=0 NVreg_Mobile=1 NVreg_FlatPanelMode=1

NVreg_Mobile=1 is most inportant one in this tip!
Nvidia recommend 2, 4 for this option, but it has resulted an freeze screen.

jjean@satellite:~$ cat /etc/X11/xorg.conf
##########################################################################
# Sample XF86Config file for NVIDIA XFree86 drivers.
#
# Refer to the XF86Config(4/5) man page for details about the format of
# this file.
#
# Be sure to replace the monitor values with correct values for your
# monitor!
##########################################################################


Section "Files"
FontPath "unix/:7100"
FontPath "/usr/lib/X11/fonts/misc"
FontPath "/usr/lib/X11/fonts/cyrillic"
FontPath "/usr/lib/X11/fonts/100dpi/:unscaled"
FontPath "/usr/lib/X11/fonts/75dpi/:unscaled"
FontPath "/usr/lib/X11/fonts/Type1"
FontPath "/usr/lib/X11/fonts/CID"
FontPath "/usr/lib/X11/fonts/100dpi"
FontPath "/usr/lib/X11/fonts/75dpi"
FontPath "/var/lib/defoma/x-ttcidfont-conf.d/dirs/TrueType"
FontPath "/var/lib/defoma/x-ttcidfont-conf.d/dirs/CID"
EndSection


##########################################################################
# Server flags section.
##########################################################################

Section "ServerFlags"

# Uncomment this to cause a core dump at the spot where a signal is
# received. This may leave the console in an unusable state, but may
# provide a better stack trace in the core dump to aid in debugging
#NoTrapSignals

# Uncomment this to disable the server abort sequence
# This allows clients to receive this key event.
#DontZap

# Uncomment this to disable the / mode switching
# sequences. This allows clients to receive these key events.
#DontZoom

# This allows the server to start up even if the
# mouse device can't be opened/initialised.
AllowMouseOpenFail

EndSection


##########################################################################
# Input devices
##########################################################################

#
# Keyboard section
#
Section "InputDevice"

Identifier "Keyboard1"
Driver "keyboard"
Option "CoreKeyboard"
Option "XkbRules" "xorg"
Option "XkbModel" "pc104"
Option "XkbLayout" "us"
EndSection


#
# Pointer section
#
Section "InputDevice"

Identifier "Mouse1"
Driver "mouse"
Option "CorePointer"
Option "Protocol" "IMPS/2"
Option "Device" "/dev/psaux"
Option "Emulate3Buttons" "true"
Option "ZAxisMapping" "4 5"
EndSection

Section "InputDevice"
Identifier "Synaptics"
Driver "synaptics"
Option "SendCoreEvents" "true"
Option "Device" "/dev/psaux"
Option "Protocol" "auto-dev"
Option "HorizScrollDelta" "0"
EndSection
##########################################################################
# Module section
##########################################################################

Section "Module"
Load "dbe"
Load "GLcore"
Load "ddc"
Load "vbe"
# Load the glx module.
Load "glx"
Load "extmod"
Load "type1"
Load "freetype"
Load "i2c"
Load "bitmap"
EndSection


##########################################################################
# Monitor section
##########################################################################

Section "Monitor"

Identifier "MyMonitor"
VendorName "Toshiba"
ModelName "Satellite 5100 laptop display"

# be sure to replace these values with values appropriate for your
# monitor!
HorizSync 30-90
VertRefresh 50-75

Modeline "1600x1200" 160.96 1600 1704 1880 2160 1200 1201 1204 1242 -HSync -Vsync


# Below line is copied from Nvidia's example.
#HorizSync 31-82
#VertRefresh 55-120

# 3840x2400 @ 12Hz for IBM's T221 FlatPanel
#Modeline "3840x2400" 148.0 3840 3944 4328 4816 2400 2401 2404 2418

EndSection


##########################################################################
# Graphics device section(s)
##########################################################################

Section "Device"
Identifier "NV AGP"
VendorName "nvidia"
Driver "nvidia"
# update this with the PCI id of your card. Consult the output
# of the 'lspci' command. The BusID is usually optional when
# only using one graphics card.
BusID "PCI:1:0:0"
Option "NvAGP" "1"
Option "RenderAccel" "true"
Option "ModeValidation" "NoMaxPClkCheck"
EndSection

Section "Device"
Identifier "NV AGP TwinView"
VendorName "nvidia"
Driver "nvidia"
# update this with the PCI id of your card. Consult the output
# of the 'lspci' command. The BusID is usually optional when
# only using one graphics card.
BusID "PCI:1:0:0"

OPtion "RenderAccel" "true"
Option "AllowGLXWithComposite" "true"
# sample twinview setup
Option "TwinView"
# be sure to replace the HorizSync and VertRefresh with correct values
# for your monitor!
Option "UseEdidDpi" "False"
# Option "ModeValidation" "CRT-0: NoEdidModes, NoMaxPClkCheck, NoMaxPClkCheck ; DFP-0: NoEdidModes"
Option "SecondMonitorHorizSync" "30-90"
Option "SecondMonitorVertRefresh" "50-75"
Option "TwinViewOrientation" "Clone"
Option "MetaModes" "1600x1200, 1600x1200, 1024x768; 1280x1024,1280x1024,1024x768; 1024x768,1024x768,1024x768"
Option "ConnectedMonitor" "DFP-0, CRT-0, TV-0"
Option "ModeValidation" "NoMaxPClkCheck, NoEdidMaxPClkCheck, NoMaxPClkCheck"# Option "TVStandard" "NTSC-M"
# Option "TVOutFormat" "Composite"
#HorizSync 30-50
#VertRefresh 60
EndSection


##########################################################################
# Screen sections
##########################################################################

#
# screen section for an nvidia AGP card
#
Section "Screen"
Identifier "Screen AGP"
Device "NV AGP"
Monitor "MyMonitor"
DefaultColorDepth 24
Subsection "Display"
Depth 8
Modes "1600x1200" "1280x1024" "1024x768" "800x600" "640x400"
EndSubsection
Subsection "Display"
Depth 16
Modes "1600x1200" "1280x1024" "1024x768" "800x600" "640x480"
EndSubsection
Subsection "Display"
Depth 24
Modes "1600x1200" "1280x1024" "1024x768" "800x600" "640x480"
EndSubsection

EndSection
#
# screen section for an nvidia AGP TwinView card
# (look at the appropriate Device section)
#
Section "Screen"
Identifier "Screen AGP TwinView"
Device "NV AGP TwinView"
Monitor "MyMonitor"
DefaultColorDepth 16
Subsection "Display"
Depth 8
Modes "1600x1200" "1280x1024" "1024x768" "800x600" "640x400"
EndSubsection
Subsection "Display"
Depth 16
Modes "1600x1200" "1280x1024" "1024x768" "800x600" "640x400"
EndSubsection
Subsection "Display"
Depth 24
Modes "1600x1200" "1280x1024" "1024x768" "800x600" "640x400"
EndSubsection
EndSection


##########################################################################
# ServerLayout sections
# (invoke using the '-layout' option of 'startx'.
##########################################################################

#
# just one agp card
#
#Section "ServerLayout"
# Identifier "AGP"
# Screen "Screen AGP"
# InputDevice "Mouse1" "CorePointer"
# InputDevice "Keyboard1" "CoreKeyboard"
# InputDevice "Synaptics"
#EndSection


# just one agp twinview card
#
Section "ServerLayout"
Identifier "AGPTwinView"
Screen "Screen AGP TwinView"
InputDevice "Mouse1" "CorePointer"
InputDevice "Keyboard1" "CoreKeyboard"
InputDevice "Synaptics"
EndSection


Most of option in this file was adopted from Nvidia's example which was included in 1.0.8762. driver.

Wednesday, August 02, 2006

Wireless on ubuntu


미국 나오기 전에 사온 wireless network card를 사용하기 위해
comcast사의 유무선 공유 모뎀을 신청하였다.
노트북을 전체 linnux로 변경 한 후에 첫번째 문제가 Nvidia driver 설치 문제였고, 그 다음에 무선 인터넷 문제였다.

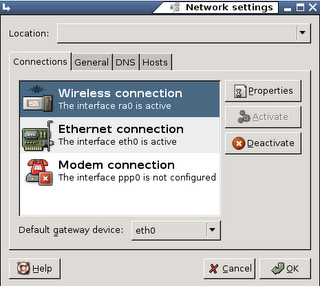
system - administration - networking에 보니 무선랜카드는 ra0으로 잡혀있다.
그런데 접속이 안된다.
당연히 안 될수 밖에, WEP 암호를 걸어놨는데...
문제는 암호를 어떻게 넣느냐? 이다.

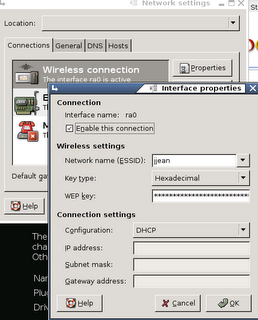
ra0 항목에서 property를 보면 암호를 넣는 항목이 있다.
여기에 최초 공유기 설정할 때 만들어진 encryption key의 16진 값을 입력하였으나, DHCP로 ip를 잡아오지 못한다.

또 인터넷을 검색.

WiFi with WEP and Even WPA on Debian


이 사이트에서 지시한 바대로 다음을 수행하였다.

apt-get install ifplugd

/etc/default/ifplugd:

INTERFACES="eth0"
HOTPLUG_INTERFACES="ra0"
ARGS="-q -f -u0 -d10 -w -I"
SUSPEND_ACTION="stop"
--------------------------------------------------------------------------------
/etc/network/interfaces:

# This file describes the network interfaces available on your system
# and how to activate them. For more information, see interfaces(5).

# The loopback network interface
auto lo
iface lo inet loopback

# The primary network interface
allow-hotplug eth0
iface eth0 inet dhcp

# Wireless... (this section may or may not already exist)
allow-hotplug ra0
iface ra0 inet dhcp

auto ra0
auto eth0
===================================
apt-get install wpasupplicant 를 수행하니 이미 설치되어 있다고 나온다.


/etc/default/wpasupplicant:

ENABLED=1
OPTIONS="-w -i wlan0 -D hostap -c /etc/wpa_supplicant.conf"

------------------------------------


/etc/wpa_supplicant.conf:
ctrl_interface=/var/run/wpa_supplicant
ctrl_interface_group=0

eapol_version=1
ap_scan=2
fast_reauth=1

# Single key 128bit WEP
network={
ssid="jjean"
key_mgmt=NONE
wep_key0=ABCDEF01234567890123456789
wep_tx_keyidx=0
priority=5
}

# WPA-PSK
#network={
# ssid="Corporate Office"
# proto=WPA
# key_mgmt=WPA-PSK
# pairwise=TKIP
# psk="very_secret"
# priority=4
#}

# Coffee shop / Open
network={
ssid=""
key_mgmt=NONE
priority=2
}

그 다음에
/etc/init.d/ifplugd start
/etc/init.d/wpasupplicant start
를 수행하니 두번째 명령이 수행되지 않는다.

wpasupplicant를 재설치 해 보았으나 마찬가지다.
알고보니 ubuntu에서 기본 설치하는 wpasupplicant는 /etc/wap_supplicant 디렉토리에
ifupdown.sh 이라는 스크립트를 만든다.

그래서 이 파일을 cp ./ifupdown.sh ../init.d/wpasupplicant로 복사해 주고 다시 실행.

그래도 접속이 되지 않는다.

자세히 보다보니, wep encryption key 중에서 하나를 잘못 적은것이다.
43E3140DE4C19D91F201C087b8 중에서 마지막의 b9를 68로 본것이다.

그걸 바로잡고 시도하니 바로 성공.

Tuesday, August 01, 2006

Ubuntu installation

Installing Ubuntu 6.05 LTS on my Toshiba satellite 5501.

1. Install ubuntu hoary CD

2. sudo passwd root

3. on root terminal,
vi /etc/apt/sources.lst
in repository list
replace 'hoary' as 'dapper'

4. apt-get update
apt-get dist-upgrade

5. reboot

6. Nvidia driver install
http://www.nvidia.com/object/linux_display_ia32_1.0-8762.html

still no pre-compiled driver, so latest 2.6.15-26-386 kernel source and header are needed.
apt-gat install linux-source-2.6.15-26-386 (or)
apt-gat install linux-source-2.6.15-26-686

apt-get install linux-386 (or linux 686)

apt-get install linux-headers-2.6.15-26-386 (or)
apt-get install linux-headers-2.6.15-26-686

Nvidia's "NVIDIA-Linux-x86-1.0-8762-pkg1.run" runs good and it makes new kernel module driver well.
But X does not start.

X's error message is that "Synaptics" "glx" "nvidia" driver were not found.

Have to switch back to "nv" driver for entering X.

Try to find reason for one day long!

http://doc.gwos.org/index.php/Latest_Nvidia_Dapper

with above howto, all trying was failed.

the method describe in there -
apt-get install nvidia-glx or
apt-get install nvidia-glx-legacy nvidia-xconfig nvidia-settings

seems to make a situation more screwed.

each driver was mixed and dis not erased clearly.


Have to find another way of dirty hack.

I, first uninstall all nvidia driver distributions all by manual.
and compared the path of each file in /var/cache/apt/archives/nvidia-glx_1.0.8762+2.6.15.11-3_i386.deb,
/var/cache/apt/archives/nvidia-kernel-source-2.6.15.11-3uk_i386.deb, and /download/NVIDIA-Linux-x86-1.0-8762-pkg1(produced by nvidia run package).
================================
root@satellite:/var/cache/apt/archives # dpkg --contents nvidia-glx_1.0.8762+2.6.15.11-3uk_i386.deb
drwxr-xr-x root/root 0 2006-07-16 12:16:58 ./
drwxr-xr-x root/root 0 2006-07-16 12:16:39 ./usr/
drwxr-xr-x root/root 0 2006-07-16 12:16:55 ./usr/bin/
-rwxr-xr-x root/root 10039 2006-07-16 12:16:51 ./usr/bin/nvidia-bug-report.sh
-rwxr-xr-x root/root 1398076 2006-07-16 12:16:54 ./usr/bin/nvidia-settings
-rwxr-xr-x root/root 135320 2006-07-16 12:16:55 ./usr/bin/nvidia-xconfig
drwxr-xr-x root/root 0 2006-07-16 12:16:54 ./usr/lib/
drwxr-xr-x root/root 0 2006-07-16 12:16:39 ./usr/lib/xorg/
drwxr-xr-x root/root 0 2006-07-16 12:16:54 ./usr/lib/xorg/modules/
drwxr-xr-x root/root 0 2006-07-16 12:16:50 ./usr/lib/xorg/modules/drivers/
-rw-r--r-- root/root 1034976 2006-07-16 12:16:50 ./usr/lib/xorg/modules/drivers/nvidia_drv.o
drwxr-xr-x root/root 0 2006-07-16 12:16:39 ./usr/lib/xorg/modules/extensions/
-rw-r--r-- root/root 653324 2006-07-16 12:16:54 ./usr/lib/xorg/modules/libglx.so.1.0.8762
drwxr-xr-x root/root 0 2006-07-16 12:16:54 ./usr/lib/tls/
-rw-r--r-- root/root 2156 2006-07-16 12:16:54 ./usr/lib/tls/libnvidia-tls.so.1.0.8762
drwxr-xr-x root/root 0 2006-07-16 12:16:55 ./usr/lib/nvidia/
-rwxr-xr-x root/root 2868 2006-07-16 12:16:55 ./usr/lib/nvidia/tls_test
-rw-r--r-- root/root 3080 2006-07-16 12:16:54 ./usr/lib/nvidia/tls_test_dso.so
-rw-r--r-- root/root 169764 2006-07-16 12:16:54 ./usr/lib/libXvMCNVIDIA.so.1.0.8762
-rw-r--r-- root/root 540136 2006-07-16 12:16:54 ./usr/lib/libGL.so.1.0.8762
-rw-r--r-- root/root 8113728 2006-07-16 12:16:54 ./usr/lib/libGLcore.so.1.0.8762
-rw-r--r-- root/root 101300 2006-07-16 12:16:54 ./usr/lib/libnvidia-cfg.so.1.0.8762
-rw-r--r-- root/root 2108 2006-07-16 12:16:54 ./usr/lib/libnvidia-tls.so.1.0.8762
drwxr-xr-x root/root 0 2006-07-16 12:16:50 ./usr/sbin/
-rwxr-xr-x root/root 4132 2006-07-16 12:16:50 ./usr/sbin/nvidia-glx-configdrwxr-xr-x root/root 0 2006-07-16 12:16:53 ./usr/share/
drwxr-xr-x root/root 0 2006-07-16 12:16:39 ./usr/share/man/
drwxr-xr-x root/root 0 2006-07-16 12:16:51 ./usr/share/man/man1/
-rw-r--r-- root/root 6342 2006-07-16 12:16:51 ./usr/share/man/man1/nvidia-settings.1.gz
-rw-r--r-- root/root 4483 2006-07-16 12:16:51 ./usr/share/man/man1/nvidia-xconfig.1.gz
drwxr-xr-x root/root 0 2006-07-16 12:16:39 ./usr/share/lintian/
drwxr-xr-x root/root 0 2006-07-16 12:16:50 ./usr/share/lintian/overrides/
-rw-r--r-- root/root 852 2006-07-16 12:16:50 ./usr/share/lintian/overrides/nvidia-glx
drwxr-xr-x root/root 0 2006-07-16 12:16:39 ./usr/share/bug/
drwxr-xr-x root/root 0 2006-07-16 12:16:51 ./usr/share/bug/nvidia-glx/
-rwxr-xr-x root/root 711 2006-07-16 12:16:51 ./usr/share/bug/nvidia-glx/script
drwxr-xr-x root/root 0 2006-07-16 12:16:53 ./usr/share/doc/
drwxr-xr-x root/root 0 2006-07-16 12:16:56 ./usr/share/doc/nvidia-glx/
-rw-r--r-- root/root 71262 2006-05-15 15:42:16 ./usr/share/doc/nvidia-glx/README.txt.gz
-rw-r--r-- root/root 82 2006-05-15 15:42:16 ./usr/share/doc/nvidia-glx/nvidia-settings-user-guide.txt
-rw-r--r-- root/root 2842 2006-07-16 12:12:55 ./usr/share/doc/nvidia-glx/README.Debian
-rw-r--r-- root/root 32707 2006-07-16 11:59:49 ./usr/share/doc/nvidia-glx/copyright
drwxr-xr-x root/root 0 2006-07-16 12:16:56 ./usr/share/doc/nvidia-glx/examples/
-rw-r--r-- root/root 1729 2006-05-15 15:42:16 ./usr/share/doc/nvidia-glx/examples/XF86Config.sample.gz
-rw-r--r-- root/root 14372 2006-07-16 12:12:41 ./usr/share/doc/nvidia-glx/changelog.Debian.gz
-rw-r--r-- root/root 8300 2006-05-15 15:42:16 ./usr/share/doc/nvidia-glx/NVIDIA_Changelog.gz
lrwxrwxrwx root/root 0 2006-07-16 12:16:54 ./usr/lib/xorg/modules/libglx.so -> libglx.so.1.0.8762
lrwxrwxrwx root/root 0 2006-07-16 12:16:54 ./usr/lib/tls/libnvidia-tls.so.1 -> libnvidia-tls.so.1.0.8762
lrwxrwxrwx root/root 0 2006-07-16 12:16:54 ./usr/lib/libXvMCNVIDIA_dynamic.so.1 -> libXvMCNVIDIA.so.1.0.8762
lrwxrwxrwx root/root 0 2006-07-16 12:16:54 ./usr/lib/libXvMCNVIDIA.so.1 -> libXvMCNVIDIA.so.1.0.8762
lrwxrwxrwx root/root 0 2006-07-16 12:16:54 ./usr/lib/libnvidia-tls.so.1 -> libnvidia-tls.so.1.0.8762
lrwxrwxrwx root/root 0 2006-07-16 12:16:54 ./usr/lib/libnvidia-cfg.so.1 -> libnvidia-cfg.so.1.0.8762
lrwxrwxrwx root/root 0 2006-07-16 12:16:54 ./usr/lib/libGLcore.so.1 -> libGLcore.so.1.0.8762
lrwxrwxrwx root/root 0 2006-07-16 12:16:54 ./usr/lib/libGL.so.1 -> libGL.so.1.0.8762
==============================

root@satellite:/var/cache/apt/archives # dpkg --contents nvidia-kernel-source_1.0.8762+2.6.15.11-3uk_i386.deb
drwxr-xr-x root/root 0 2006-07-16 12:16:58 ./
drwxr-xr-x root/root 0 2006-07-16 12:16:53 ./usr/
drwxr-xr-x root/root 0 2006-07-16 12:16:50 ./usr/src/
-rw-r--r-- root/root 1696636 2006-07-16 12:16:50 ./usr/src/nvidia-kernel-source.tar.gz
drwxr-xr-x root/root 0 2006-07-16 12:16:53 ./usr/share/
drwxr-xr-x root/root 0 2006-07-16 12:16:53 ./usr/share/doc/
drwxr-xr-x root/root 0 2006-07-16 12:16:56 ./usr/share/doc/nvidia-kernel-source/
-rw-r--r-- root/root 2159 2006-07-16 11:59:49 ./usr/share/doc/nvidia-kernel-source/README.Debian.gz
-rw-r--r-- root/root 32707 2006-07-16 11:59:49 ./usr/share/doc/nvidia-kernel-source/copyright
-rw-r--r-- root/root 14372 2006-07-16 12:12:41 ./usr/share/doc/nvidia-kernel-source/changelog.Debian.gz


==============================
root@satellite:/download/NVIDIA-Linux-x86-1.0-8762-pkg1 # ls -RAl ./usr
./usr:
total 20
drwxrwxrwx 2 root root 4096 2006-05-15 15:42 bin
drwxrwxrwx 3 root root 4096 2006-05-15 15:42 include
drwxrwxrwx 3 root root 4096 2006-05-15 15:42 lib
drwxrwxrwx 5 root root 4096 2006-05-15 15:42 share
drwxrwxrwx 3 root root 4096 2006-05-15 15:42 X11R6

./usr/bin:
total 1612
-rwxrwxrwx 1 root root 20472 2006-05-15 15:42 makeself.sh
-rwxrwxrwx 1 root root 51514 2006-05-15 15:42 mkprecompiled
-rwxrwxrwx 1 root root 10039 2006-05-15 15:42 nvidia-bug-report.sh
-rwxrwxrwx 1 root root 1402144 2006-05-15 15:42 nvidia-settings
-rwxrwxrwx 1 root root 138068 2006-05-15 15:42 nvidia-xconfig
-rwxrwxrwx 1 root root 3220 2006-05-15 15:42 tls_test
-rwxrwxrwx 1 root root 3384 2006-05-15 15:42 tls_test_dso.so

./usr/include:
total 4
drwxrwxrwx 2 root root 4096 2006-05-15 15:42 GL

./usr/include/GL:
total 460
-rwxrwxrwx 1 root root 339652 2006-05-15 15:42 glext.h
-rwxrwxrwx 1 root root 72949 2006-05-15 15:42 gl.h
-rwxrwxrwx 1 root root 29571 2006-05-15 15:42 glxext.h
-rwxrwxrwx 1 root root 13644 2006-05-15 15:42 glx.h

./usr/lib:
total 8632
-rwxrwxrwx 1 root root 8154252 2006-05-15 15:42 libGLcore.so.1.0.8762
-rwxrwxrwx 1 root root 652 2006-05-15 15:42 libGL.la
-rwxrwxrwx 1 root root 543564 2006-05-15 15:42 libGL.so.1.0.8762
-rwxrwxrwx 1 root root 102404 2006-05-15 15:42 libnvidia-cfg.so.1.0.8762
-rwxrwxrwx 1 root root 2352 2006-05-15 15:42 libnvidia-tls.so.1.0.8762
drwxrwxrwx 2 root root 4096 2006-05-15 15:42 tls

./usr/lib/tls:
total 4
-rwxrwxrwx 1 root root 2324 2006-05-15 15:42 libnvidia-tls.so.1.0.8762

./usr/share:
total 12
drwxrwxrwx 2 root root 4096 2006-05-15 15:42 applications
drwxrwxrwx 3 root root 4096 2006-05-15 15:42 doc
drwxrwxrwx 3 root root 4096 2006-05-15 15:42 man

./usr/share/applications:
total 4
-rwxrwxrwx 1 root root 227 2006-05-15 15:42 nvidia-settings.desktop

./usr/share/doc:
total 280
-rwxrwxrwx 1 root root 2021 2006-05-15 15:42 Copyrights
drwxrwxrwx 2 root root 4096 2006-05-15 15:42 html
-rwxrwxrwx 1 root root 23527 2006-05-15 15:42 NVIDIA_Changelog
-rwxrwxrwx 1 root root 3790 2006-05-15 15:42 nvidia-settings.png
-rwxrwxrwx 1 root root 82 2006-05-15 15:42 nvidia-settings-user-guide.txt
-rwxrwxrwx 1 root root 233103 2006-05-15 15:42 README.txt
-rwxrwxrwx 1 root root 7624 2006-05-15 15:42 XF86Config.sample

./usr/share/doc/html:
total 460
-rwxrwxrwx 1 root root 5806 2006-05-15 15:42 appendix-aa.html
-rwxrwxrwx 1 root root 13163 2006-05-15 15:42 appendix-a.html
-rwxrwxrwx 1 root root 5457 2006-05-15 15:42 appendix-b.html
-rwxrwxrwx 1 root root 8681 2006-05-15 15:42 appendix-c.html
-rwxrwxrwx 1 root root 40428 2006-05-15 15:42 appendix-d.html
-rwxrwxrwx 1 root root 8123 2006-05-15 15:42 appendix-e.html
-rwxrwxrwx 1 root root 11089 2006-05-15 15:42 appendix-f.html
-rwxrwxrwx 1 root root 21375 2006-05-15 15:42 appendix-g.html
-rwxrwxrwx 1 root root 7030 2006-05-15 15:42 appendix-h.html
-rwxrwxrwx 1 root root 8889 2006-05-15 15:42 appendix-i.html
-rwxrwxrwx 1 root root 16036 2006-05-15 15:42 appendix-j.html
-rwxrwxrwx 1 root root 3888 2006-05-15 15:42 appendix-k.html
-rwxrwxrwx 1 root root 14574 2006-05-15 15:42 appendix-l.html
-rwxrwxrwx 1 root root 4506 2006-05-15 15:42 appendix-m.html
-rwxrwxrwx 1 root root 2915 2006-05-15 15:42 appendix-n.html
-rwxrwxrwx 1 root root 3178 2006-05-15 15:42 appendix-o.html
-rwxrwxrwx 1 root root 5220 2006-05-15 15:42 appendix-p.html
-rwxrwxrwx 1 root root 5138 2006-05-15 15:42 appendix-q.html
-rwxrwxrwx 1 root root 4437 2006-05-15 15:42 appendix-r.html
-rwxrwxrwx 1 root root 7571 2006-05-15 15:42 appendix-s.html
-rwxrwxrwx 1 root root 3413 2006-05-15 15:42 appendix-t.html
-rwxrwxrwx 1 root root 3171 2006-05-15 15:42 appendix-u.html
-rwxrwxrwx 1 root root 4425 2006-05-15 15:42 appendix-v.html
-rwxrwxrwx 1 root root 10822 2006-05-15 15:42 appendix-w.html
-rwxrwxrwx 1 root root 17963 2006-05-15 15:42 appendix-x.html
-rwxrwxrwx 1 root root 5526 2006-05-15 15:42 appendix-y.html
-rwxrwxrwx 1 root root 3611 2006-05-15 15:42 appendix-z.html
-rwxrwxrwx 1 root root 3726 2006-05-15 15:42 chapter-01.html
-rwxrwxrwx 1 root root 4090 2006-05-15 15:42 chapter-02.html
-rwxrwxrwx 1 root root 4289 2006-05-15 15:42 chapter-02-section-02.html
-rwxrwxrwx 1 root root 3633 2006-05-15 15:42 chapter-02-section-03.html
-rwxrwxrwx 1 root root 3864 2006-05-15 15:42 chapter-02-section-04.html
-rwxrwxrwx 1 root root 3910 2006-05-15 15:42 chapter-03.html
-rwxrwxrwx 1 root root 5621 2006-05-15 15:42 chapter-03-section-02.html
-rwxrwxrwx 1 root root 24205 2006-05-15 15:42 chapter-04.html
-rwxrwxrwx 1 root root 34940 2006-05-15 15:42 chapter-05.html
-rwxrwxrwx 1 root root 3279 2006-05-15 15:42 chapter-06.html
-rwxrwxrwx 1 root root 3131 2006-05-15 15:42 chapter-07.html
-rwxrwxrwx 1 root root 20801 2006-05-15 15:42 chapter-08.html
-rwxrwxrwx 1 root root 2872 2006-05-15 15:42 chapter-09.html
-rwxrwxrwx 1 root root 6580 2006-05-15 15:42 index.html
-rwxrwxrwx 1 root root 3266 2006-05-15 15:42 part-01.html
-rwxrwxrwx 1 root root 2776 2006-05-15 15:42 part-02.html
-rwxrwxrwx 1 root root 4701 2006-05-15 15:42 part-03.html
-rwxrwxrwx 1 root root 2987 2006-05-15 15:42 preface-01.html
-rwxrwxrwx 1 root root 4098 2006-05-15 15:42 preface-02.html

./usr/share/man:
total 4
drwxrwxrwx 2 root root 4096 2006-05-15 15:42 man1

./usr/share/man/man1:
total 24
-rwxrwxrwx 1 root root 5515 2006-05-15 15:42 nvidia-installer.1.gz
-rwxrwxrwx 1 root root 6342 2006-05-15 15:42 nvidia-settings.1.gz
-rwxrwxrwx 1 root root 4483 2006-05-15 15:42 nvidia-xconfig.1.gz

./usr/X11R6:
total 4
drwxrwxrwx 3 root root 4096 2006-05-15 15:42 lib

./usr/X11R6/lib:
total 364
-rwxrwxrwx 1 root root 185050 2006-05-15 15:42 libXvMCNVIDIA.a
-rwxrwxrwx 1 root root 170732 2006-05-15 15:42 libXvMCNVIDIA.so.1.0.8762
drwxrwxrwx 4 root root 4096 2006-05-15 15:42 modules

./usr/X11R6/lib/modules:
total 8
drwxrwxrwx 2 root root 4096 2006-05-15 15:42 drivers
drwxrwxrwx 2 root root 4096 2006-05-15 15:42 extensions

./usr/X11R6/lib/modules/drivers:
total 2048
-rwxrwxrwx 1 root root 1034976 2006-05-15 15:42 nvidia_drv.o
-rwxrwxrwx 1 root root 1050245 2006-05-15 15:42 nvidia_drv.so

./usr/X11R6/lib/modules/extensions:
total 648
-rwxrwxrwx 1 root root 657104 2006-05-15 15:42 libglx.so.1.0.8762


The cause of the trouble is progra path!!!

nvidia's compile path was not compatible with ubuntu xorg path.
I don't know who should be blame for this.
may the one would follow the standard xorg schem, another does not.

so I have to copy nvidia's file in
/usr/X11R6/lib to /usr/lib/xorg/.

My X looks like entering good!
But very bright appeared first and then goes back to black screen.

Looks like it has refresh rate or RAMDAC problem.

So I put section "Modes" in /etc/X11/xorg.conf with scratching internet.

Finally I can see the NVIDIA logo after 3days from installing!

This is my xorg.conf file.
Still have lot a work. (Optimize, Twinview <-- this option cause system freeze)

# nvidia-xconfig: X configuration file generated by nvidia-xconfig
# nvidia-xconfig: version 1.0 (buildmeister@builder3) Mon May 15 13:23:42 PDT 2006

# /etc/X11/xorg.conf (xorg X Window System server configuration file)
#
# This file was generated by dexconf, the Debian X Configuration tool, using
# values from the debconf database.
#
# Edit this file with caution, and see the /etc/X11/xorg.conf manual page.
# (Type "man /etc/X11/xorg.conf" at the shell prompt.)
#
# This file is automatically updated on xserver-xorg package upgrades *only*
# if it has not been modified since the last upgrade of the xserver-xorg
# package.
#
# If you have edited this file but would like it to be automatically updated
# again, run the following commands:
#
# cp /etc/X11/xorg.conf /etc/X11/xorg.conf.custom
# sudo sh -c 'md5sum /etc/X11/xorg.conf >/var/lib/xfree86/xorg.conf.md5sum'
# sudo dpkg-reconfigure xserver-xorg

Section "ServerLayout"
Identifier "Default Layout"
Screen "Default Screen" 0 0
InputDevice "Generic Keyboard"
InputDevice "Configured Mouse"
InputDevice "Synaptics Touchpad"
EndSection

Section "Files"

# local font server
# if the local font server has problems, we can fall back on these
# paths to defoma fonts
FontPath "unix/:7100"
FontPath "/usr/lib/X11/fonts/misc"
FontPath "/usr/lib/X11/fonts/cyrillic"
FontPath "/usr/lib/X11/fonts/100dpi/:unscaled"
FontPath "/usr/lib/X11/fonts/75dpi/:unscaled"
FontPath "/usr/lib/X11/fonts/Type1"
FontPath "/usr/lib/X11/fonts/CID"
FontPath "/usr/lib/X11/fonts/100dpi"
FontPath "/usr/lib/X11/fonts/75dpi"
FontPath "/var/lib/defoma/x-ttcidfont-conf.d/dirs/TrueType"
FontPath "/var/lib/defoma/x-ttcidfont-conf.d/dirs/CID"
EndSection

Section "Module"
Load "i2c"
Load "bitmap"
#Load "dri"
#Load "glcore"
Load "ddc"
Load "extmod"
Load "freetype"
Load "glx"
Load "int10"
Load "type1"
Load "vbe"
EndSection

Section "InputDevice"
Identifier "Generic Keyboard"
Driver "keyboard"
Option "CoreKeyboard"
Option "XkbRules" "xorg"
Option "XkbModel" "pc104"
Option "XkbLayout" "us"
EndSection

Section "InputDevice"
Identifier "Configured Mouse"
Driver "mouse"
Option "CorePointer"
Option "Device" "/dev/input/mice"
Option "Protocol" "ImPS/2"
Option "Emulate3Buttons" "true"
Option "ZAxisMapping" "4 5"
EndSection

Section "InputDevice"
Identifier "Synaptics Touchpad"
Driver "synaptics"
Option "SendCoreEvents" "true"
Option "Device" "/dev/psaux"
Option "Protocol" "auto-dev"
Option "HorizScrollDelta" "0"
EndSection

Section "Monitor"
Identifier "Generic Laptop Display Panel 1600x1200"
HorizSync 30-90
VertRefresh 50-75
EndSection

Section "Modes"
Identifier "1:0"
ModeLine "1600x1200" 161.89 1600 1672 2032 2176 1200 1202 1214 1240 -HSync -VSync
EndSection


Section "Device"

# Driver "nv"
# Option "DPMS"
Identifier "NVIDIA Corporation NV17 [GeForce4 440 Go]"
Driver "nvidia"
EndSection

Section "Screen"

# Option "RenderAccel" "true"
# Option "AllowGLXWithComposite" "true"
# Option "useEDIDdpi" "false"
# Option "ModeValidation" "NoEdidDFPMaxSizeCheck, NoVesaModes"
# Option "GenerateRTList" "0"
# Option "OverridePolarity" "1"
Identifier "Default Screen"
Device "NVIDIA Corporation NV17 [GeForce4 440 Go]"
Monitor "Generic Laptop Display Panel 1600x1200"
DefaultDepth 16
Option "ModeValidation" "NoMaxPClkCheck;NoEdidMaxPClkCheck"
# Option "ExactModeTimingsDVI" "TRUE"
# Option "ModeValidation" "DFP-0: NoEdidDFPMaxSizeCheck, NoVesaModes"# option "IgnoreEDID" "1"
SubSection "Display"
Depth 1
Modes "1600x1200"
EndSubSection
SubSection "Display"
Depth 4
Modes "1600x1200"
EndSubSection
SubSection "Display"
Depth 8
Modes "1600x1200"
EndSubSection
SubSection "Display"
Depth 15
Modes "1600x1200"
EndSubSection
SubSection "Display"
Depth 16
Modes "1600x1200"
EndSubSection
SubSection "Display"
Depth 24
Modes "1600x1200"
EndSubSection
EndSection


Wednesday, June 21, 2006

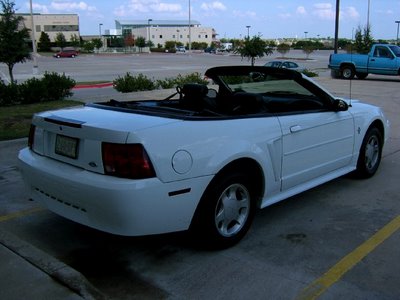
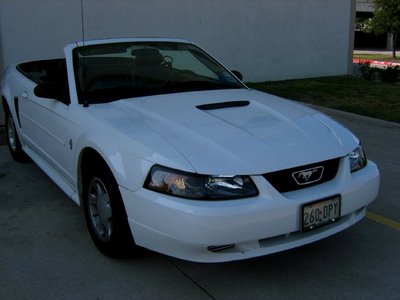
미제차로 샀다

미국에 돈벌러 왔으니 미제차를 타줘야겠다 싶었는데, 막상 와서보니 미제차가 좀 그러네.

고장이 많다는 말도 많고, 연비가 너무 안 좋아서 부담이 많이 된다던데...

여기는 우리처럼 신차는 직영 대리점에서, 중고차는 중고차 상사에서 사는게 아니라

신차도 딜러샵이 있는데 그게 자동차 회사 직영이 아니라 개인 딜러가 그 회사차만 전문으로 파는 것이고, 거기서 고객이 신차 사면서 교환한 중고차도 같이 취급하더라. 아예 중고차만 파는 딜러샵들은 그보다 월씬 많고.

미국에서도 중고차 딜러들 하면 말 잘하고, 사기 잘 치는 것으로 정평이 나있다더만.

여긴 무조건 자율 가격이라 중고차 값의 경우는 얼마나 잘 흥정하냐에 따라 가격이 엄청나게 차이가 난단다.

다들 속은건 아닌지 찜찜해 하면서도 서류 처리도 대행해 주는 딜러에게서 구매했다길래, 난 그냥 미국 옥션인 eBay에서 차를 찾았다.

한 나흘 동안 차를 보니 배기량이나 고장 등등 생각하니 일제차가 눈에 자꾸 들어오데.


< 출처 : http://toyota.images.free.fr/ >

첫번째가 도요타 셀리카 2000년식 (8000불 수준, 1800cc)


< 출처 : http://donlafferty.com/ >
두번째가 2001년식 미쯔비시 이클립스 ( 7천5백불 수준, 2500cc)


< 출처 : http://www.prestigestyle.com/ >
세번째로 미제인 2002년식 mercury cougar (6000천불 수준, 2500cc)
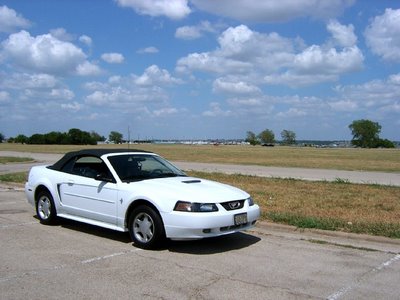
몇대 입찰 걸어놓고 기다리던 중에, 가까운데 사는 사람이 올린 Ford Mustang이 눈에 띄더군.
3800cc라는 배기량과 convertable이라는 점이 좀 맘에 걸리긴 했지만 가까운 데라는 점과 싸게 살수 있을까 하는 마음에 바로 달라 붙었지.
그래서 막판까지 기다렸다 6,800불에 내가 가장 높은 가격 제시했는데, 그 사람이 받고자 한 최소 가격보다 더 낮아서 유찰!
그래서 위의 차들 중 하나를 계속 노리고 있었는데 메일이 왔데.
7000불에 팔겠다고..
그래서 이메일로 실물을 볼수 있냐니까 그러자고 해서 그저께 dallas 가서 만났다.
60대 중반이 넘은 뚱배 할배가 나왔더군.
살까말까 했는데 차를 보니 너무 깨끗해서 바로 사고 싶어져서 사기로 하고 헤어졌다.
다음날 낮에 은행가서 수표 만들고, 자동차 보험 가입해서 저녁에 만나서 바로 차 사버렸다.
사자마자 오늘 낮에 가서 자동차 등록도 다 끝냈다.
개인간 거래로 사서 세금, 딜러 수수료 등 한 100불 이상 아낀 셈이지.
회사 사람들도 싸게 샀다고 하던데, 오늘 한국 사람 카센터 갔더니 거기 사장님도 그러데.
아래 사진보고 감상하기 바람.


Monday, June 12, 2006

Dallas 근황

숙소에서 1시간 정도 떨어진 dallas에 한국사람들이 제법 있어서, 거의 모든 한국 물건을 구할수 있네. 물 갈아먹고 배탈날까봐 공항에서 부랴부랴 준비한 정로환도 사이즈 별로 다 팔고있네...


콩나물같은 한국 사람만 먹는 채소부터 희한한 열대과일까지 다 있고

마트 내의 식당에서는 5불(5천원 이하) 가격에 김치찌개, 비빔밥, 순두부 찌개, 육개장 등등을 파는데 양은 한국보다 훨씬 많이 주네.


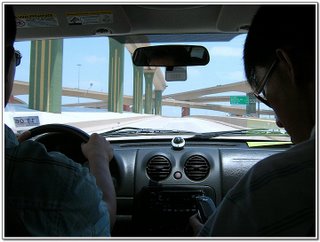
달라스 지역 고속도로들이 어찌나 많은지 교차로가 무슨 놀이공원의 레일 꼬인거보다 더 복잡하네


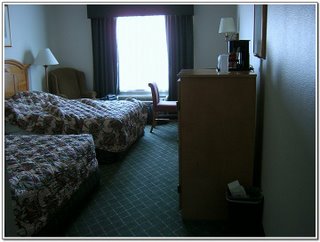
지금 묵고있는 방. 사람은 한명인데 침대 두개짜리를 주네..

노트북 연결만 하면 바로 인터넷 접속 가능.
지금 이 자리에 앉아서 하는 중..


오는 비행기 안에서 스튜어디스가 커피, 녹차 중에서 뭐 마실거냐고 묻길래 '녹차 티백 좀 주면 안되겟냐' 했더니 고추장까지 덤으로 얹어서 주길래 얻어온거. 위의 한국인 거주지의 KOMART가면 쉽게 구하는 거였는데....


Wednesday, March 15, 2006

Ubuntu dhcp

기존의 고정 IP에서 유동 IP로 변경됨에 따라 dhcp client 설정 필요하게 되었다.

그러나 KT의 경우는 그것이 쉽지 않은데.....
처음엔 단순하게 생각하고 /etc/network/interfaces 파일만을 수정해 두었다.

기존의 /etc/network/interfaces
auto lo
iface lo inet loopback

mapping hotplug
script grep
map eth0

iface eth0 inet staticaddress 192.168.1.110
netmask 255.255.255.0

iface eth1 inet staticaddress 192.168.0.1
netmask 255.255.255.0

변경한 /etc/network/interfaces

auto lo
iface lo inet loopback

mapping hotplug
script grep
map eth0

iface eth0 inet dhcp

iface eth1 inet staticaddress 192.168.0.1
netmask 255.255.255.0

auto eth1
auto eth0

이렇게 하고 장비를 옮겨서 재부팅하면 바로 사용가능하리라 판단하였다.

그러나

부팅 후 네트웍이 살지않아 ifconfig 명령을 해보니

network interface는 살아있으니 eth0에 ip address가 인가되어 있지 않다.
/etc/init.d/dhclient start 명령을 직접 주어보니
네트웍 주소를 받아오지 못한다.

몇번의 삽질 끝에 파악하기로는
아마도 KT에서 network card의 MAC address를 탐지하여
기존에 인가된 주소와 일치할 경우에만 주소를 주는 것으로 판단된다.
/etc/dhcp3/dhclient.conf파일을 일단 살펴보았다.

그래서 아래와 같이 /etc/dhcp3/dhclient.conf를 수정하였다.

#send host-name "andare.fugue.com";
send dhcp-client-identifier 1:0:01:80:22:26:79;
#send dhcp-lease-time 3600;
#supersede domain-name "fugue.com home.vix.com";
#prepend domain-name-servers 127.0.0.1;
request subnet-mask, broadcast-address, time-offset, routers,
domain-name, domain-name-servers, host-name,
netbios-name-servers, netbios-scope;
#require subnet-mask, domain-name-servers;
#timeout 60;
#retry 60;
#reboot 10;
#select-timeout 5;
#initial-interval 2;
#script "/etc/dhcp3/dhclient-script";
#media "-link0 -link1 -link2", "link0 link1";
#reject 192.33.137.209;

timeout 60;
retry 60;
reboot 10;
select-timeout 5;
initial-interval 2;

alias {
# interface "eth0";
# fixed-address 192.5.5.213;
# option subnet-mask 255.255.255.255;
}

#lease {
# interface "eth0";
# fixed-address 192.33.137.200;
# medium "link0 link1";
# option host-name "andare.swiftmedia.com";
# option subnet-mask 255.255.255.0;
# option broadcast-address 192.33.137.255;
# option routers 192.33.137.250;
# option domain-name-servers 127.0.0.1;
# renew 2 2000/1/12 00:00:01;
# rebind 2 2000/1/12 00:00:01;
# expire 2 2000/1/12 00:00:01;
#}

그 다음 부팅한 결과 dhcp로 주소를 정상적으로 받아오는 것이 확인 되었다.